
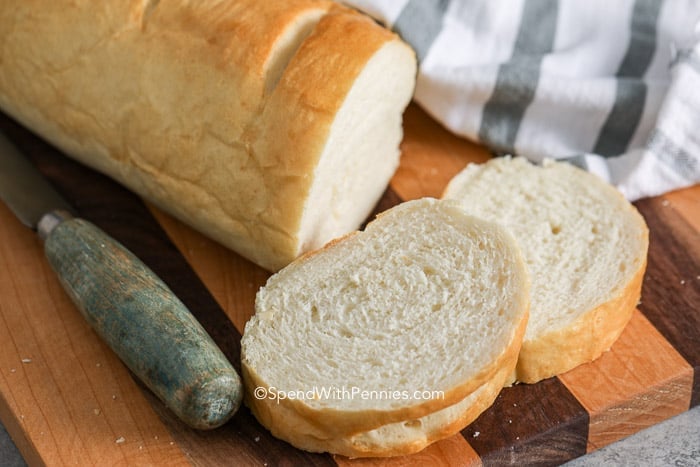
There is nothing better than a homemade loaf of crusty French Bread.
This recipe uses only a few ingredients and while it takes time, it’s easy. Even YOU can make the perfect loaf of french bread!
This is great to serve alongside a spaghetti dinner (or any pasta recipe) and makes a delicious garlic bread. It’s also perfect for homemade French toast for a lazy Sunday morning!

Tips for Baking Bread
Yeast The most important part of this recipe is to make sure your yeast is not expired. Use an active dry yeast. You will proof your yeast with a mixture of sugar and water, this ‘feeds’ the yeast so it can rise your bread! If you don’t see a foamy layer like the image below, your yeast isn’t good to bake with.
Flour Start with the smallest amount of flour in the recipe (2 3/4 cups in this recipe). For french bread, you want to add just enough to create a dough that is still slightly sticky. Too much flour will make a dense loaf.
Kneading by Hand Knead by hand on a lightly floured surface for 3-5 minutes.
Kneading with a Stand Mixer Place the dough in a mixer with a dough hook. Allow it to mix on medium speed for about 2 minutes.

How to Make French Bread
A true French bread contains just water, flour, yeast, and salt although you’ll commonly find other ingredients added to French bread in North America. French bread can vary in shapes and sizes from baguettes, to loaves to round in shape and is often baked in a steam oven resulting in the perfect crust (I’ve included my tip for getting steam into your oven below in the crust section).
This basic French loaf recipe can be altered to include slivers of garlic, fresh herbs like rosemary or thyme, or even a handful of shredded cheese. The varieties are endless, but all versions start with the same basic steps!
- Make Dough
- Combine warm water with sugar, until fully dissolved, then stir in yeast. Let it sit until foamy.
- Stir in the flour and salt, and mix well. Knead a few minutes
- Rise #1 about 1 hour in a warm place until doubled.
- Rise #2 punch down and rise again 30 minutes.
- Form Loaf You can form the loaf from the ball of dough but I like to roll it out to a rectangle and roll it up jelly roll style and pinch the edges under to seal.
- Rise #3 Let the bread rise another 30 minutes and then brush with egg white.
- Bake until golden brown on top. Cool on a wire rack.
For the Perfect Crust
Add slashes to the loaf You can purchase a tool for this (a bread lame) but if you don’t make a lot of bread, just use a very sharp knife. The purpose of the slashes you see on a loaf of bread is to help keep the bread in the desired shape while it expands as it bakes. If brushing with egg, slash the bread after.
Brush with egg if desired Brushing the outside of the bread with egg white will give a glossy crisp crust, this is optional. For a soft crust, brush with melted butter.
Add Steam Generously spritz both the bread and the inside of the oven with water (don’t spritz your hot glass with water though and be sure to check your user manual first) or add a handful of ice cubes into a cast iron skillet and place it in the oven with the bread. Steam helps give the perfect crust

How to Soften French Bread
The best way to keep your homemade French bread fresh is to keep it in an airtight container or zippered bag. French bread can also be stored in aluminum foil as long as it is tightly wrapped but be sure to store it away from extreme temperatures.
Turn into crostini and top with bruschetta, or top with garlic butter for delicious homemade garlic bread.
More Yummy Bread Recipes
- Bacon Cheddar Garlic Bread – loaded with toppings!
- Irish Soda Bread – deliciously dense bread
- Caprese Bruschetta – perfect on top of French bread!
- Easy Crostini – crunchy, versatile, and garlicky!
- Homemade Garlic Bread – classic side dish
- Easy Beer Bread – easy no yeast bread!
- Jalapeno Cheddar Bread – perfect amount of spice
- Cheese Bread (Quick Bread) – no kneading!
- Homemade Potato Bread – so soft & fluffy!
Did you love this French Bread? Be sure to leave a rating and a comment below!

Homemade French Bread
Equipment


Ingredients
- 1 tablespoon sugar
- 1 cup warm water 110° to 115°
- 1 package active dry yeast 2 ¼ teaspoons
- ¾ teaspoon salt
- 2 ¾ to 3 cups flour
- 1 egg white
Instructions
- Combine sugar and 1 cup warm water in a bowl. Stir in yeast and let stand 5 minutes.
- Stir in salt and 2 cups of flour. Continue adding flour a bit at a time to form a stiff dough. Knead until about 5 minutes (or use a dough hook on a stand mixer per notes below).
- Place dough in a greased bowl and cover with a kitchen towel. Let rise 1 hour or until doubled. Punch dough down and let rise 30 minutes more.
- Roll dough into a 14"x10" square and roll up jelly roll style to create a 14"x2.5" loaf. Place on a parchment lined pan seam side down. Using a sharp knife, cut 3-4 diagonal slits into the loaf (about ¼" deep).
- Cover with a damp towel and let rise 30-40 minutes or until doubled. Brush bread with egg white. Preheat oven to 425°F.
- Place in the oven and bake 20-25 minutes or until browned. Cool on a baking rack.
Notes
Nutrition Information
Nutrition information provided is an estimate and will vary based on cooking methods and brands of ingredients used.
© SpendWithPennies.com. Content and photographs are copyright protected. Sharing of this recipe is both encouraged and appreciated. Copying and/or pasting full recipes to any social media is strictly prohibited. Please view my photo use policy here.
Like our recipes?
Follow us on Pinterest!

Recipe Adapted Martin, Verneil. “Among Friends Vol II”. Calgary, AB, 1989. 39. Print.


Made his yesterday but it was very chewy and the crust tough… only used just over 2 cups flour as with 1 cup of water the dough felt dry.
I don’t know what went wrong but won’t make it again
I am sorry to hear that Sue! I am not sure what went wrong either. Chewy dense bread can be a sign of over kneading so make sure if you are using a stand mixer that you only knead it for 90 seconds on medium speed.
Didn’t use a mixer to knead, did it by hand and family agreed it was very dense… it was a little better to eat when I toasted it
Oh darn, well I am glad toasting them helped you to enjoy this batch!
Found this today and it will be my new go to for sure! 5* all the way. I used 2 cups of bread flour and it turned out perfect!
this was great and easy! we used a 1/4 cup sourdough started discard in addition to the yeastfor extra flavor and I did a tiny bit less yeast because of that. it was perfect. a not to beginner bread makers, I think you want to add enough flour so that it’s sticky smooth but not more. it’s always better to have a bit less flour that too much, imho, since too much makes a dry loaf.
thanks for another great recipe!
Those are great tips Rebecca!
Which amount of flour is the correct one, 2 3/4 to 3 cups, or 2 cups?
Yes, 2 ¾ to 3 cups flour. Start with 2 ¾ cups, and add as needed.
Lol Timing is everything. Didn’t know at the time and made it with 2 cups using bread flour which I swear makes a difference. Brushed with butter because we prefer a soft crust. Was so awesome! Decided to make sub sandwich bread for lunch and just set it asode for the first rise – again using 2 cups. Next time I’ll try 2 3/4 and see how it works for me. Great recipe, thanks
Thank you for sharing Steve! So glad it turned out for you.
Love this recipe! I’ve made it multiple times and the family devours it. Thank you!
So happy your family is enjoying this recipe, Jenn!
I made this using rapid rise dried yeast, followed all the directions per recipe, my wife ate slices with spaghetti and I had mine with tomato soup. Excellent results for first try. Not bad for a half blind senior citizen MALE. Definitely pinning this recipe.
So glad you both loved it Bob!
This is so easy to make and so good!
Pls help to find perfect gram i cant understand 1/4 1/3 pls sent me perfect one recpie
I don’t have these available in grams. I would suggest using an online converter. Enjoy the recipe.
I baked this French Bread this afternoon to have with homemade split pea soup for our supper. The bread was delicious! The recipe was simple and produced a generous size loaf with enough left over for French toast for breakfast. I used bread flour with excellent results.
Great idea about the ice cubes for steam. Quicker than pouring water into an oven pan.
So glad you enjoyed it Judy!
I baked this French Bread this afternoon to accompany homemade split pea soup. The bread was delicious! Simple recipe but perfect in every way! One generous loaf for the evening meal with some left over for French toast tomorrow morning.
This recipe comes out perfect every time. The loaves are quite large. For just two of us I make four small loaves freezing some after the first rise. I have replaced my other French bread recipe with this one.
Many newer ovens have a double proofing cycle. My bread proofs in about 20 minutes.
Thanks for the tips Kathy!
Just thought I’d let you know – I used you recipe with home grown wild yeast and whole grain wheat flour I ground myself – came out great – but know the time needed to raise the dough is long – since it is wild yeast.(I also didn’t mix with salt in with the yeast – wild yeast really doesn’t like salt – just compbined it when I was mixing).
That is really neat Richard! Thanks for sharing!
How much instant yeast would you use instead of active dry yeast and does instant yeast change the directions at all? Sorry if this is a silly question, new to bread making.
Not a silly question at all Jennifer! I haven’t made this recipe with instant yeast so I am not sure how it will turn out but some general tips are: instant yeast doesn’t need to proof so you do not need to let it sit for 5 minutes as directed in step 1, you will also want to use approximately ⅓ less yeast than what’s indicated in the recipe. I hope that helps! Let us know how it turns out.
What kind of flour do you recommend for this recipe?
Hi Anna, For this recipe, we used all-purpose flour.
Saturday night: I started this last night on a whim at 9pm and was in bed before midnight. This was soooo easy (there was a lot of web surfing between risings). I cheated by putting everything in the stand mixer at once (dough hook) – 90 seconds on ‘stir’ and 5 min at med-low speed to knead. 1 rookie mistake: I put the entire 2.75 c of flour in at the beginning. It ended up being a touch too much flour for the weather and resulted in a denser loaf than the family would have liked. Sunday 11am: I woke up to comments of, ‘Why did you go shopping so late?’ :). Visually, the crumb and the crust was true to the pictures here. I’m really impressed. So much so, I’m making another one now to (try to) improve on last night’s loaf. The first made some excellent french toast this am, btw. I’ve been told that ‘now we don’t need to buy it anymore!’. I admire their optimism and will be teaching them the recipe so we can get it into our weekend rotation regularly. Thanks for a great, easy (soon-to-be tween friendly) recipe.
Ah yay Michelle, I’m so glad your family loved it!!